|
When the user types an auto completion sign, e.g. a dot, in the editor you can present the user with a list of methods. This is usually used with class objects.
Classes
The top list should be populated with classes and the list below with the class methods.
* is allowed for class names and can be useful when adding class items.
Some examples from the JavaScript syntax file are:
*.getElementsByTagName()[].
*navigator.
math.
The class item *.getElementsByTagName()[]. allows us to open an auto completion list when we type something like this:
var x = document.getElementsByTagName("BUTTON")[0].
This will list members like "attributes" ...
Members
Press "Add" to open the dialog box seen below. The "item" and "icon" are displayed in the auto completion list when opened. And "code" is the text that is inserted in the editor when selected.
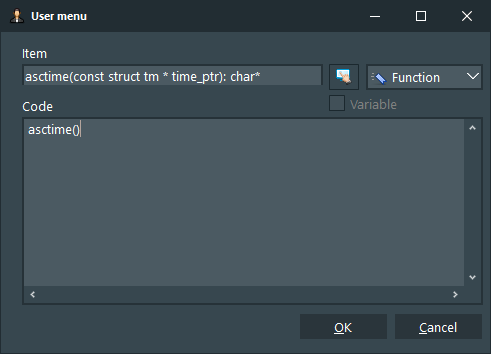
The syntax editor will try to be helpful when you paste text into the item field. E.g.
char* asctime(const struct tm * time_prt);
is pasted as seen in the image above. Return values should be entered last (after a : colon). The identifier (function name) should be first for the auto completion to function properly.
Variables
Variables can be used to simplify the editing.
Instead of a class name, enter a variable name like @base. Add members to the variable, just like you did above. You can now use the variable name as a member of another class and save you the trouble of typing all the members again. You can even use a variable within a variable.
E.g.
Create a variable named @base and add some members.
@base
Add()
Delete()
Refresh()
Now we create a class called myClass. It should contain the members "Add(), Delete() and Refresh()" plus a few more. We can now write:
myClass
@base
Clear()
Exit()
|